
CCR1000
This section contains support specific to the CCR1000 stage. If your question isn’t listed here it could be covered under the ‘General Stage Support’ page.
Loading a sample
removing a sample
Changing A Heater
1 - Removing the old heater
Required Tools
- Phillips Head Screwdriver
- Flat Heat Screwdriver
- 2.5mm Hex Key
- Tweezers (Optional)
If the stage has recently been used it may still be hot! Ensure heater has cooled sufficiently before attempting to remove.
NOTE: You must perform all operations in sequence unless otherwise stated.
This section will cover removing the old heater from the CCR1000 body. There are two designs for the CCR1000 depending on the age. Where the two designs differ, this guide will include instructions for both. The PREVIOUS design of CCR1000 has a separate electrical connector for the thermocouple at 90° to the main electrical cover.

The previous style stage. Note the thermocouple connector highlighted in green which is not present on the current stages
The current stage design has all of the wiring routed through one cover and looks like this.
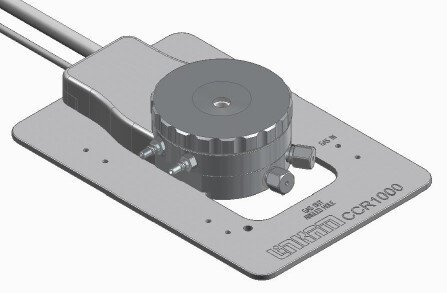
The current style stage
1.0 Remove Base (Previous Stage Only)
If you have the previous CCR1000 design the base must be removed to access one of the water channel bolts. To remove the base the 6 screws highlighted in the image below should be unscrewed. The base can then be pulled away, being careful with the wiring.
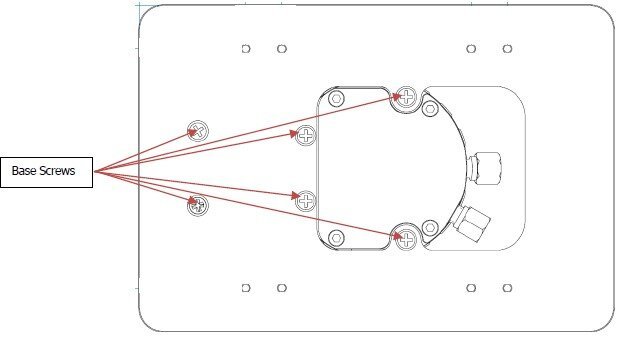
The base with the relevant screws highlighted
1.1 Remove Lid
Unscrew the lid from the top of the stage. This will allow you to check the window and related O-ring and replace if necessarily.
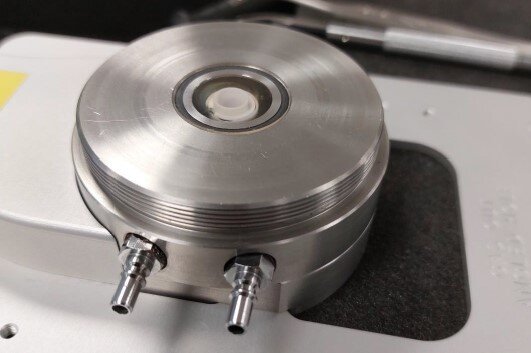
The window and O-ring with the lid removed
1.2 Undo Water Channel
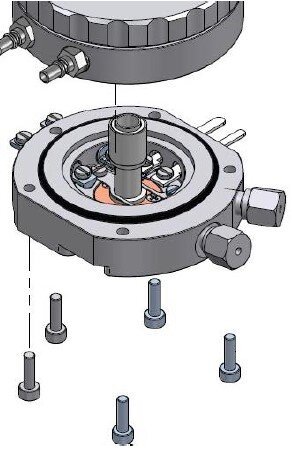
Turn the stage upside down and remove the 5 hex bolts holding the water channel to the body. Take care when removing the channel because water could still be held. Two designs! The positioning of the bolts is very slightly different but there are still five in a very similar pattern. With the previous design you will have removed the base prior to this stage.
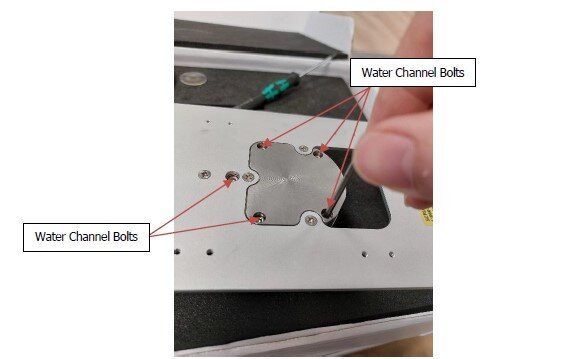
The bolts (labelled) to remove the water channel
The water channel removed from the body
1.3 Undo Heater Wire and Heater Clamp Screws
Remove the flathead screws from the heater clamp and the four screws from the heater and thermocouple wires. Take note of the orientation of these wires. Two Designs! The current style of heater has the two heater wires in the centre with the thermocouple wires routing to the copper pins on either side. The previous style has the heater wires facing away from the Linkam logo and the thermocouple wires at 90°. The current design has four flathead screws in the heater clamp and the previous design has three. All are to be removed before lifting the heater.
The screw positions for the current heater (left) and the previous heater (right)
1.4 Remove Heater
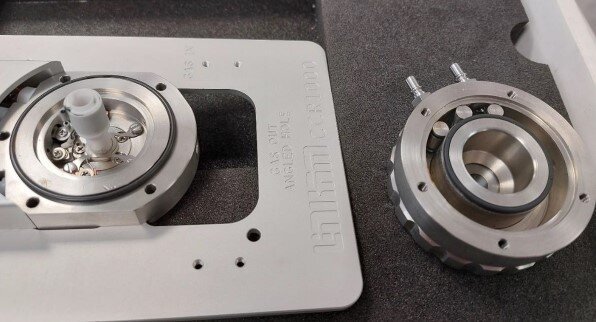
Remove the sample holder following the procedure stated in the user manual. The sample holder may feel stuck in the gas seal cover but it is only held in place by an o-ring. Carefully pull the heater up from the body making sure the wires are not caught.
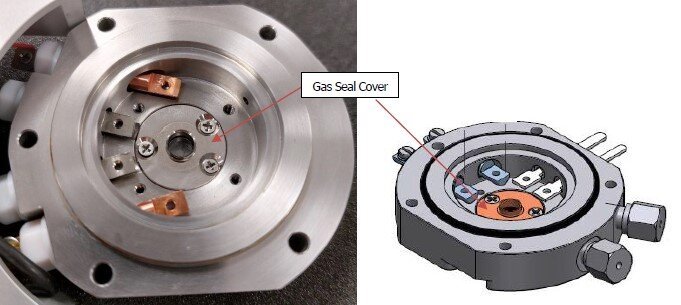
The bodies without the heater. Note the gas seal covers screwed down in the centre. Current (left) and previous (right) stage bodiesi>
2 - Fitting the New Heater
Required Tools
- Phillips Head Screwdriver
- Flat Heat Screwdriver
- 2.5mm Hex Key
- Tweezers (Optional)
If the stage has recently been used it may still be hot! Ensure heater has cooled sufficiently before attempting to remove.
NOTE: You must perform all operations in sequence unless otherwise stated.
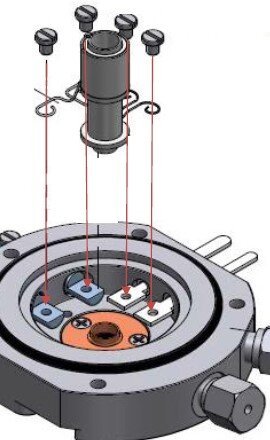
2.1 Place Heater
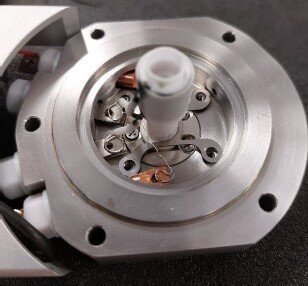
Place the new heater into the stage body. Gently press the sample holder to make sure it is fitted through the O-ring in the gas seal.
Two Designs The differences previously mentioned all can be seen here but this step is not different between the two heaters.
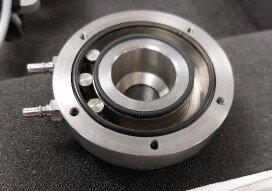
The heater placed in the body
2.2 Screw Wiring
Carefully screw the heater and thermocouple wires into the correct places. See the views below for more detail. Make sure to fit a washer between the wire and the screw head.
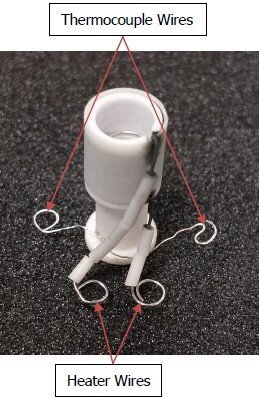
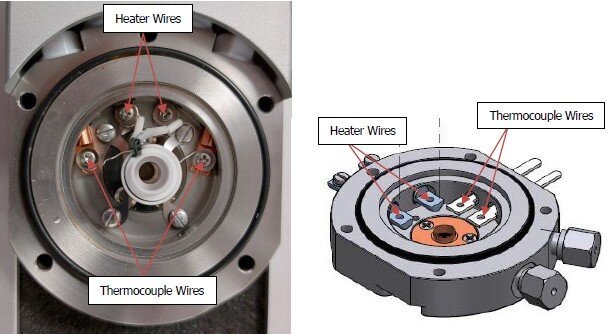
The current heater with the wires labelled
Two Designs The layout of the wiring pins is different for these two stages. Check which figure applies to your stage before screwing the wires.
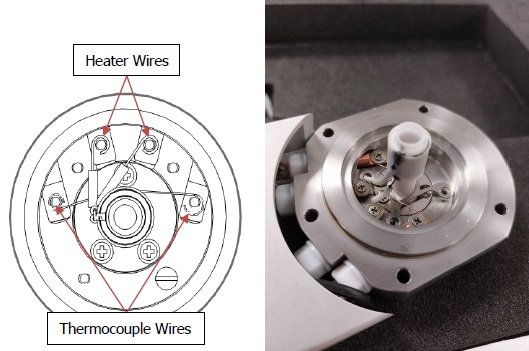
The location of each wire in the current stage
The location of each wire in the previous stage
2.3 Screw Heater Clamp
Screw the heater clamp down. Ensure that the clamp screws are not touching the wiring pins.
Two Designs Although the heater clamp is different the procedure is still the same.
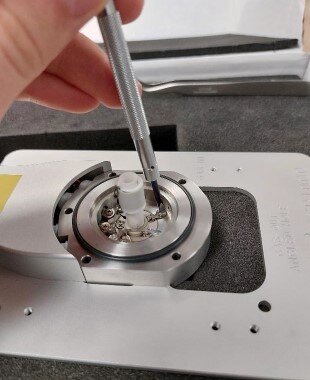
Screwing the heater clamp in place on the current stage
2.4 Replace Water Channel
Check the condition of the two water channel O-rings, one may be stuck on the stage body. If the O-rings are damaged, replace them. Turn the stage upside down and refit the water channel. The bolts used to hold the channel fix from the bottom.
Two Designs The bolt placement may be slightly different but the procedure is still the same.
The O-rings fitted to the heater and water channel
The positioning of the bolts for the current stage
The positioning of the bolts for the previous stage
2.5 Replace Lid
If needed replace the window and O-ring and then screw the lid onto the stage body. If using the previous stage screw the stage body back onto the base. Your stage should now be ready to use.
The previous stage base and screw positions
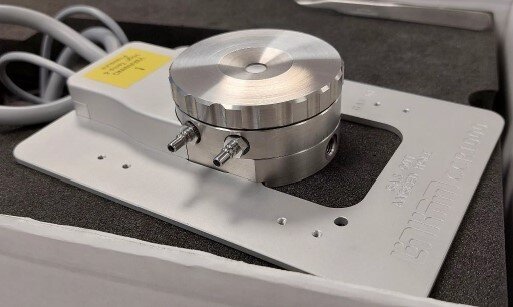
A CCR1000 Stage with the heater fitted