
NEXUS Software Support
This section answers common questions about NEXUS software and provides solutions to get you back up and running as quickly as possible.
Minimum required system specifications for NEXUS
NEXUS Core
Processor: Intel i5 (>2GHz) 6th generation or higher
Memory: 8GB RAM
Display: 1920 X 1080 or greater
HDD: 200GB
USB 2.0 / 3.0 port for connection to a T95 or T96 controller
OS: Windows 10 or 11 (64-bit)
Additional requirements for NEXUS Image Capture Module
Processor: Intel i7 (>3GHz) 6th Generation or higher
Memory: 16GB RAM
HDD: 1TB or higher (SSD preferable)
Please note that recording images, especially those which are of high resolution or are uncompressed, requires a lot of storage space.USB 3.0 port for connection to a camera
USB 2.0 / 3.0 port for connection to a RLS20, if being used
Additional requirements for other NEXUS Modules
No further requirements for the other modules
How do I install NEXUS
INSTALLING NEXUS
RUNNING INSTALLER
1. Double click the Install.exe file contained on your Linkam USB flash drive; the installation program will start.
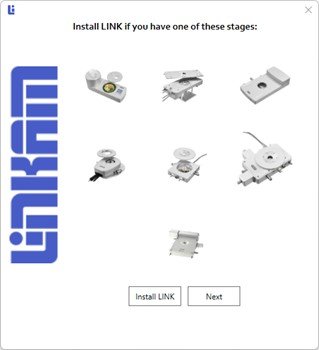
2. You only need to install LINK if the stage you require is not currently supported by NEXUS. If required, click the install LINK button, and refer to the LINK user guide for further installation instructions.
3. Click the Next button.
4. The NEXUS installation page displays.
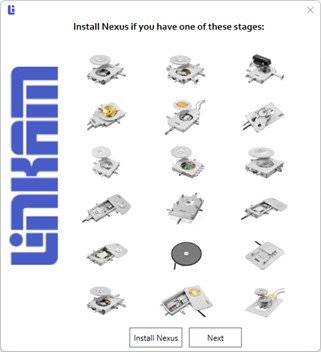
5. Click the install NEXUS button and go to NEXUS Installation.
6. Click the Next button.
7. The camera driver page displays.
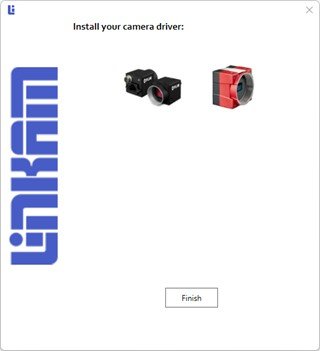
8. If you do not have a camera, go to step 10.
9. Click the image that matches your camera type to install the appropriate driver software.
10. Click the Finish button.
Note: For Allied Vision cameras you must ensure NEXUS is installed before installing these drivers. Allied Vision drivers add modules to the NEXUS installation which must be present to successful register them. Also, ensure you have installer the transport driver to the camera before use. Please go to Allied Vision Driver Installation for further details.
NEXUS INSTALLATION
This assumes you have followed the steps in the running installer section.
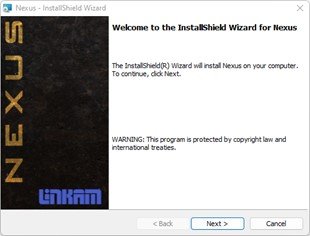
1. The NEXUS installer starts.
2. Click the Next button.
3. The installer will check your system for prerequisites and install them if required. You may need to restart your PC after each one is installed.
4. The Ready to Install window appears.
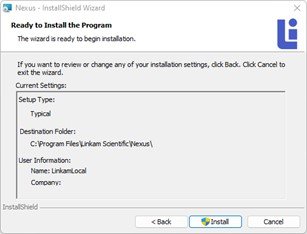
5. Click the Install button.
6. The installing window appears, please wait for installation to complete.

7. The completion window appears.
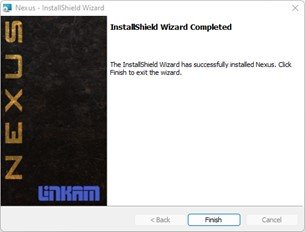
8. Click the Finish button.
9. Return to step 6 of the running installer section.
ALLIED VISION DRIVER INSTALLATION
Allied Vision cameras are not shipped with transport driver installed to the camera hardware. This is to ensure that the version of host camera controller software integrated within the NEXUS Allied Vision module is a match for the driver on your camera. The camera driver software installed by the Linkam installer does not install the transport drivers to your camera. You will need to install and configure the Allied Vision module for use with NEXUS. Users must use the provided Allied Vision tools to program the camera with the equivalent transport firmware.
INSTALL CAMERA DRIVERS
1. Plug in the Allied Vision camera into a USB 3.0 port.
2. On the desktop of your PC locate the Vimba Driver Installer icon and double click it.

Alternatively, you can use Explorer if you cannot locate the desktop icon:
1. Open an Explorer window using the keys ⊞ + E.
2. Navigate to:
C:\Program Files\Allied Vision\Vimba_5.1\Tools\DriverInstaller\Win64.
3. Double click the “VimbaDriverInstaller” tool
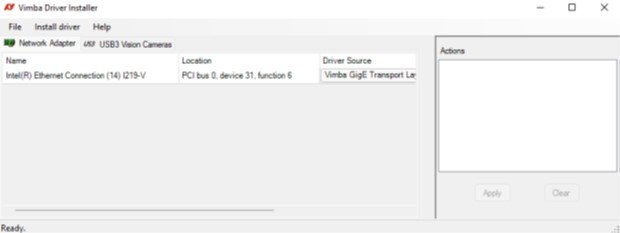
4. Once the tool has opened click on the USB3 Vision Cameras tab.
5. Click into the Device Source column, this will open a menu.
6. Click the Vimba USB Transport Layer option.
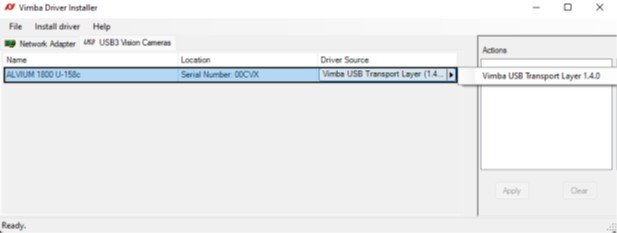
7. This will place add the Install Vimba USB Transport Layer action into the Actions list on the right.
8. Click the Apply button.
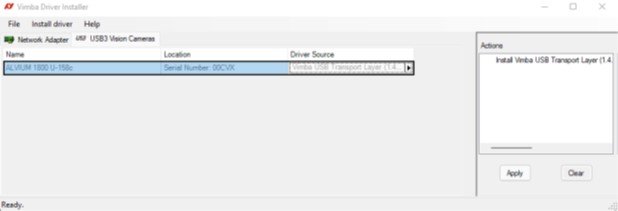
9. Follow the on-screen instructions to install the driver to the camera.
How do I register NEXUS
TEMPORARY LICENCING
1. Have your Software Activation card to hand.
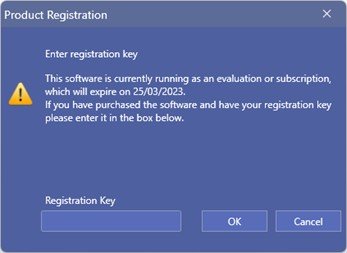
2. Start NEXUS and shortly after you will see the following message:
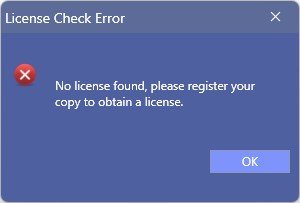
3. Click the OK button and the Registration screen appears.
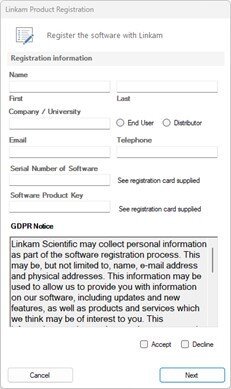
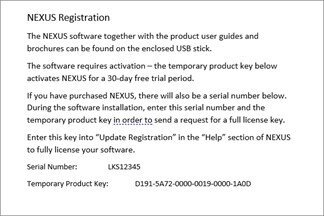
4. Fill out the form, you will need your Software Activation card which has the software serial number and temporary product key on the back.
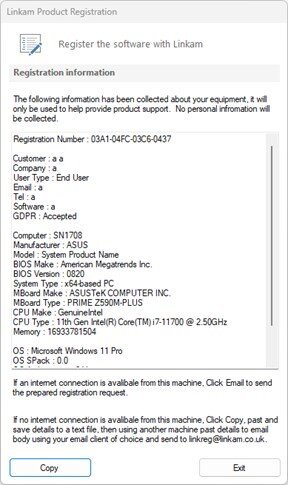
5. Click Next button and wait a few moments for the registration review screen to appear.
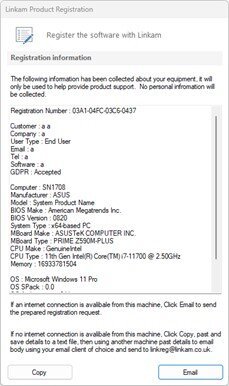
6. Now send Linkam your registration details.
If your PC is connected to the internet and has access to an email application, click the Email button to open a prepared registration email and go to step 7.
If not, click the Copy button and message informs you a readymade email has been copied to the clipboard for you.
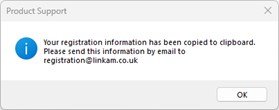
Click OK button and another message appears informing you that we have saved a copy to your PC in file called "email_me_to_linkam.txt".

7. The registration review screen Email button changes to an Exit button. Click Exit button.
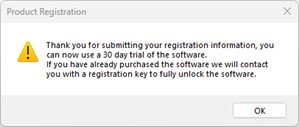
8. A message appears informing you that your 30-day trial has started. Click OK button.
9. The NEXUS production registration screen appears, click Cancel button.
10. NEXUS will now start using your trial licence.
NOTE: You will continue to see the NEXUS production registration screen each time you start NEXUS until a full registration key is provided. Check your email for your full registration key.
How do i change my licence
1. Start NEXUS.
2. Select OPEN option on start screen.
3. A File Open dialog box appears, close it.
4. Go to the Settings window using the Options menu.
5. Switch to the Licencing tab.
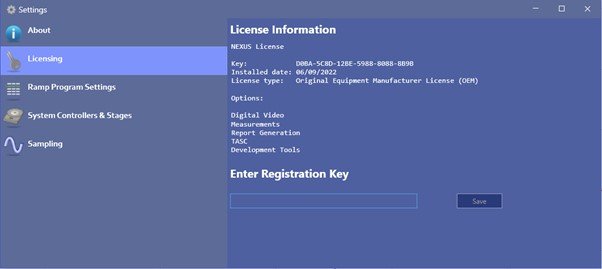
6. Paste or type your new registration key into the provided field. Once entered correctly the Save button activates.
7. Click Save button.
8. A summary of your new licence appears below.
9. Restart NEXUS to complete.