
LINK Software Support
This section answers common questions about LINK software and provides solutions to get you back up and running as quickly as possible.
Minimum required system specifications for LINK
- Processor: Intel Core i7-series ( > 3GHz)
- Intel 7 series "Ivy Bridge" Chipset Motherboard (or later)
- Operating System: Microsoft Windows 10
- Memory: 8GB RAM
- Display: 1920 x 1080 or greater resolution
- HDD: 200Gb
- Free USB 2.0/3.0 port for connection to a Linkam Temperature Controller
- Free USB 2.0/3.0 port if using a Linkam Imaging Station
- Free USB 3.0 port if using a USB 3.0 camera
- PCI express slot for a Firewire card, if using a Firewire camera
- Optional internet connection for download
NB - LINK only supports Linkam T95 or T96 controllers.
We strongly recommend that the PC BIOS and chipset drivers are updated to their latest versions and that all Windows updates are applied. Older driver versions may cause connectivity issues with LINK.
How Do I install LINK
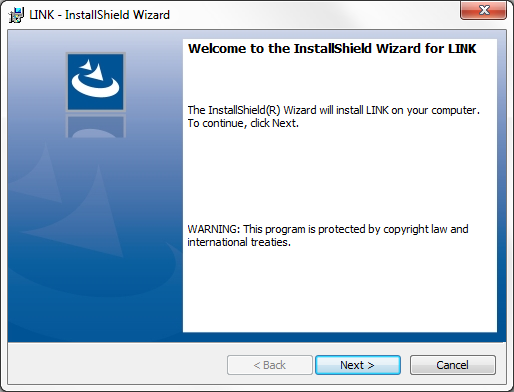
1) Insert your LINK USB key into a free USB port on your PC, and navigate to it in Windows explorer. Double click on the 'Start.hta' file, click the 'Next' button at the bottom of the page and click on the 'Install LINK' button. The following setup screen will appear:
2) Click next and the licence agreement screen will appear.
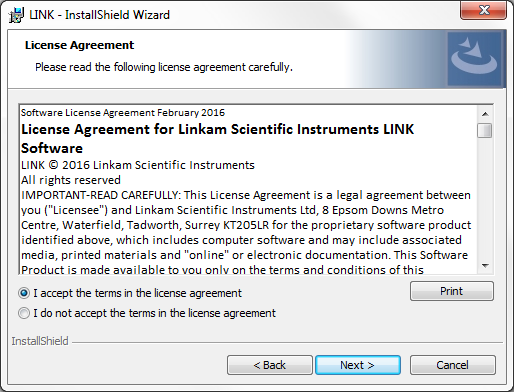
This can be printed if required by clicking the 'Print' button. Select 'I accept' and click on 'Next'.
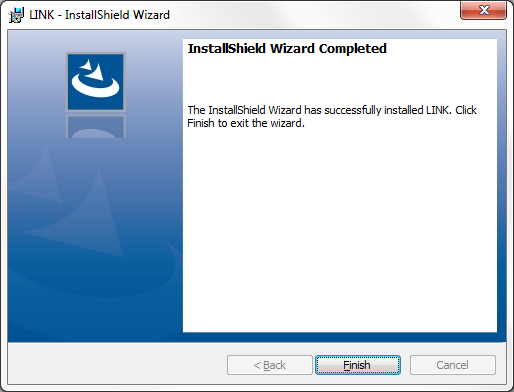
Click on 'Finish' to complete the installation.
How do I register LINK
Temporary Licence Activation
Temporary Licencing
1. When LINK is first run after installation a software registration screen will automatically display.
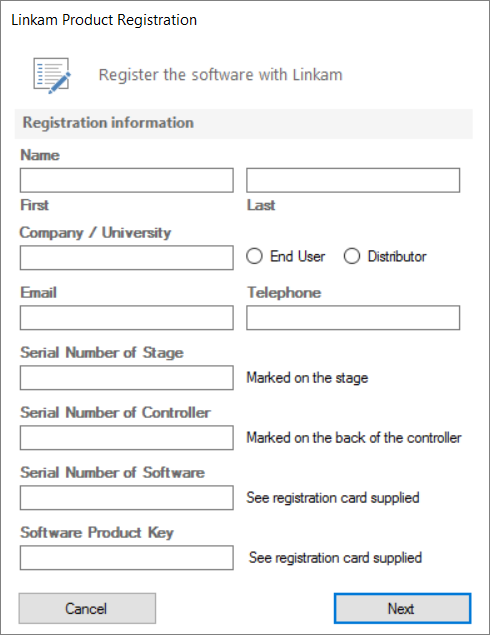
Fill in the information fields and click 'Next'.
Note: Clicking 'Cancel' will cancel this process and start the LINK software, but it will be unusable until the initial registration process is complete. In order to get the registration form back up in this case, LINK will need to be restarted.
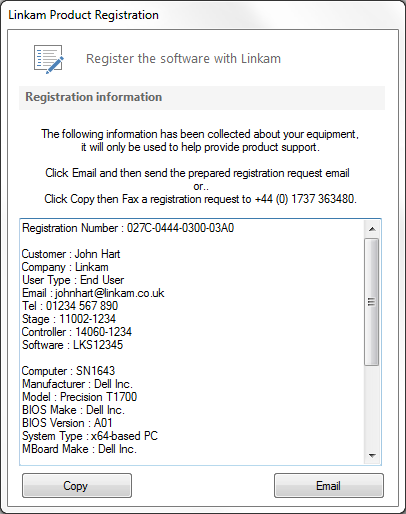
2. Clicking on 'Email' will automatically create an email to linkreg@linkam.co.uk containing all details needed for Linkam to provide a permanent licence key for your software. This feature will only function if there is a Microsoft Outlook email client configured on the local PC.
In the event that you do not have Outlook configured on the PC, clicking the 'Copy' button will copy the relevant information to the computer clipboard, where it can be pasted into the email client of your choice.
3. Once copied or emailed, an 'Exit' button will appear. Clicking on this will cause the following confirmation dialogue to appear:
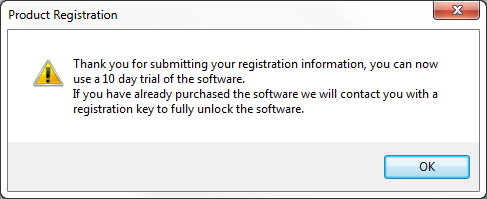
Click 'OK' to this message and the main LINK software will start. At this point, you have 10 days in which to enter a permanent licence key. After this 10 day period the LINK software will become unusable until such time as a permanent key is entered.
Permanent Licence Activation
1. When you receive your licence key from Linkam Scientific, start your LINK software and the following screen will appear:
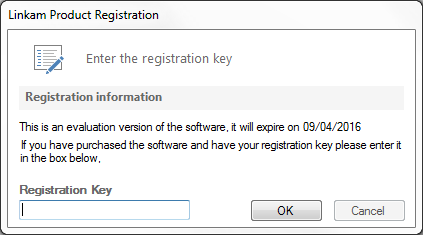
If this screen does not appear and instead you see the initial registration screen this is likely caused by an admin rights issue. Please see the "Update registration option greyed out" section below.
Enter the supplied licence key into the 'Registration Key' field and click on OK to update to a permanent licence. It is also possible to update the key from within LINK (for example if you have purchased additional features after owning a more basic version). To do this click on the 'Help' menu and select 'Update registration'

2. The following screen will appear:
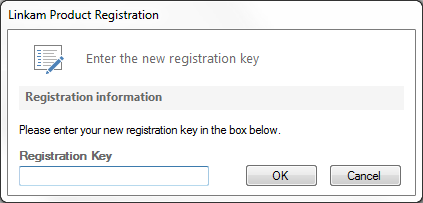
3. Enter the licence key you were sent by Linkam into the 'Registration Key' field and click OK. The software will now need to be restarted.
Your LINK software is now fully licenced.
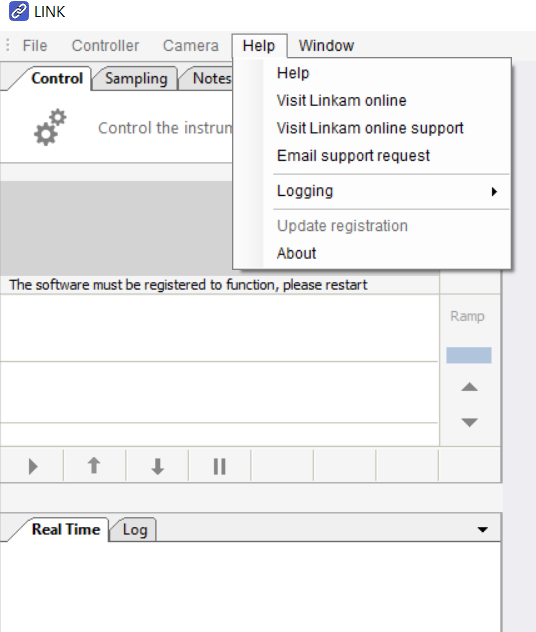
The licencing information can be retrieved from LINK at any time by clicking on the 'Help' menu and selecting 'About'.
Update registration option greyed out
This error occurs due to an admin rights issue. In order to register LINK, the program needs access to create/modify a file in the program files directory when it is first run and when you update the licence (if you do not have this option please consult your IT admin).
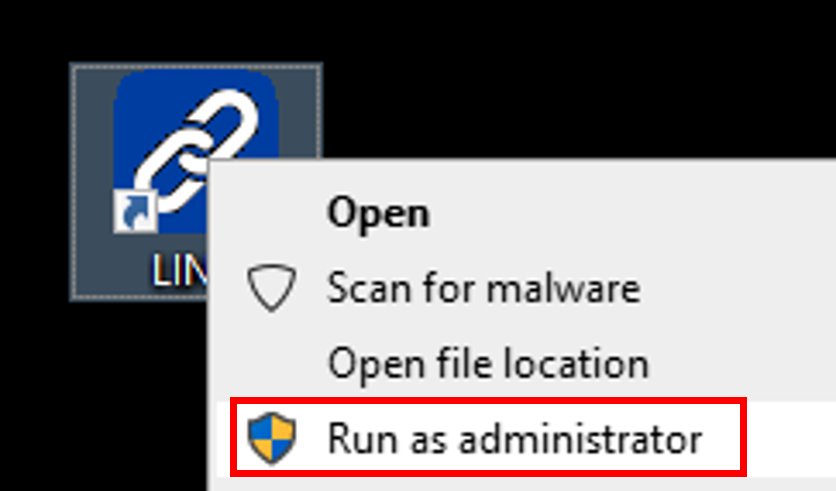
- Close LINK
- Right click on the desktop shortcut for LINK and select "Run as administrator"
Important: Being logged in as a user with admin rights is insufficient as this does not grant the required admin rights to LINK to update the licence key files. - If the initial registration screen comes up, this needs to be filled in again, however you can input you permanent licence key (if you have obtained one)
The LINK registration screen does not display correctly
If the LINK registration screen that appears the first time the software is loaded does not display correctly, for example the 'Next' and 'Cancel' buttons are not displayed, the likely cause of this is the Windows text display size being set to a value other than the default 96dpi (100%)
To resolve this, follow the below procedure:
- Open the Control Panel in Windows
- Select 'Display'
- Select 'Change Display Settings' on the left side of the screen
- Make sure the slider entitled 'Change the size of text, apps and other items:' is set to 100%, at the far left of the slider
- Retry the LINK registration
T9X controller will not connect to LINK
If you have selected the correct connection method (either USB or the RS232 port - note that RS232 is only available for T95 controllers) and click on the connect button within LINK and nothing happens or an error message appears, it may be that the firmware version of your T9X controller is too old for the installed version of LINK.
See the entry on updating the firmware on T9X controllers for instructions on updating the T9X firmware version.
It is also possible for this issue to be caused by older USB / Chipset drivers on your PC. Make sure this is updated to the latest version for your machine, and check that your PC conforms to the minimum system requirements (as outlined above).
Unable to connect to camera
If you see the message "Unable to connect to camera" in LINK when you click the CAMERA > SHOW menu option and you have checked that you have selected the correct camera model (Point Grey or QImaging) it's possible the camera drivers are not installed. In this instance follow the instructions below:
- Close LINK
- Browse the LINK software installation media (USB stick) you were provided to the following folder: Installers\Digital Video Drivers
- From there run the quick installer file for the appropriate camera manufacturer
- Reopen LINK and click CAMERA > SHOW menu option again